Step-by-Step Guide to Flushing Cistern Installation
 11 Sept 2026
 Share
Share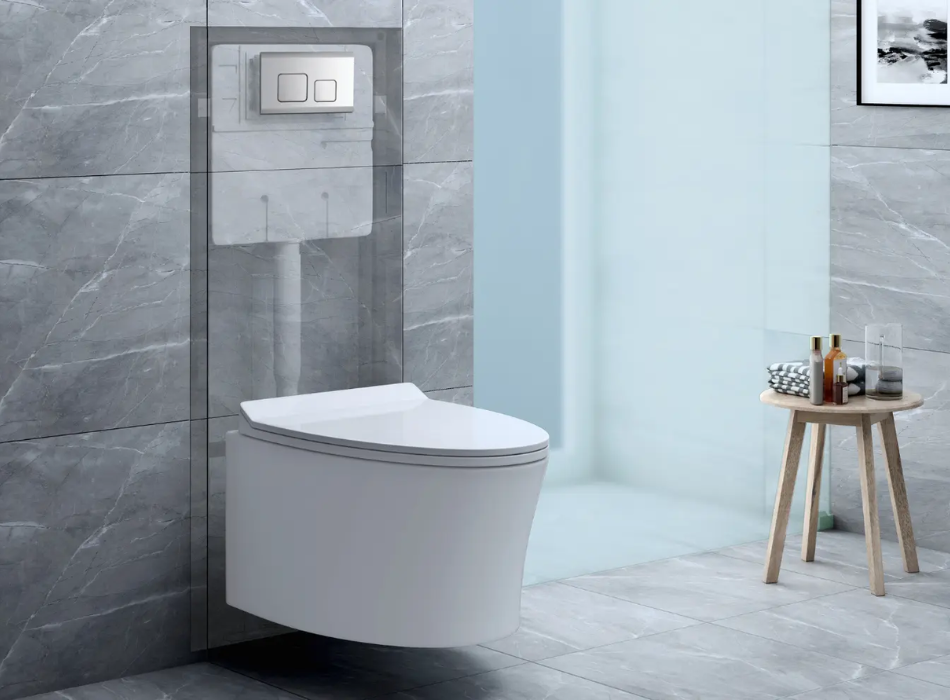
A well-functioning toilet is an essential part of any modern bathroom, and the cistern plays a crucial role in ensuring efficient flushing performance. Whether you are renovating a bathroom, replacing an old unit, or installing a new toilet, understanding the process of cistern installation can help ensure a smooth and reliable setup.
Today, concealed and exposed cisterns have become popular choices due to their functionality, water efficiency, and aesthetic appeal. As part of modern bathroom accessories, a properly installed flushing cistern contributes to convenience, hygiene, and long-term performance. Let’s walk through the key steps involved in installing a flushing cistern while highlighting important considerations for a successful installation.
Understanding the Role of a Bathroom Cistern
A bathroom cistern is a water storage tank connected to a toilet bowl that releases water during flushing. It stores a predetermined volume of water and controls its release through internal mechanisms such as fill valves and flush valves.
Modern cisterns are available in various styles, including concealed cisterns that are hidden behind walls and exposed models, mounted directly on the toilet or wall. Both options provide effective flushing performance while supporting water-saving features.
Before beginning a flushing cistern installation, it is important to select a cistern that is compatible with your toilet design and bathroom layout.
Tools and Materials Required
Before starting the installation process, gather the necessary tools and materials:
- Flushing cistern unit
- Mounting frame or brackets
- Measuring tape
- Spirit level
- Drill and drill bits
- Adjustable wrench
- Screwdrivers
- Water supply connectors
- Sealant
- Screws and wall plugs
- Flush plate or push-button assembly
Having all materials ready beforehand can help make the installation process more efficient.
Preparing the Installation Area
Proper preparation is one of the most important aspects of successful cistern installation.
Begin by identifying the installation location and ensuring there is sufficient space for the cistern and connecting pipework. If you are installing a concealed cistern, the supporting frame and wall cavity must be capable of accommodating the cistern dimensions.
Next:
- Turn off the water supply
- Mark the installation height according to the manufacturer's specifications
- Check wall alignment and structural support
- Ensure access points for maintenance are considered
Accurate measurements at this stage help in preventing costly adjustments later.
How to Install a Toilet Cistern?
Step 1: Install the Supporting Frame
For concealed systems, begin by positioning the installation frame against the wall. Use a spirit level to ensure the frame is perfectly vertical and horizontal. Secure the frame firmly using appropriate fixings. The frame must be stable enough to support the cistern and withstand daily use.
Step 2: Position the Cistern
Once the frame or brackets are secured, carefully position the cistern.
Check that:
- The cistern is at the same level
- Water inlet connections are accessible
- Flush pipe alignment matches the toilet pan
A properly positioned cistern helps ensure efficient flushing and prevents operational issues.
Step 3: Connect the Water Supply
Connect the water supply line to the inlet valve of the cistern.
During this stage:
- Ensure all connections are secure tightly
- Avoid overtightening the fittings
- Use sealing materials where required
Once connected, the supply line should allow water to flow smoothly into the cistern without leaks.
Step 4: Install the Flush Pipe
The flush pipe connects the cistern to the toilet bowl and plays a critical role in flushing performance. Carefully align the pipe and secure all joints according to the manufacturer's instructions. Proper alignment prevents leaks and ensures effective water delivery during flushing.
Step 5: Test Internal Components
Before closing the wall or completing the installation, inspect the internal components.
Check:
- Fill valve operation
- Flush valve functionality
- Water level settings
- Overflow protection
Adjust settings as required to achieve optimal flushing performance and water efficiency.
Step 6: Secure the Access Panel or Flush Plate
For concealed installations, attach the flush plate or push-button assembly.
The access panel serves two important purposes:
- Provides access for future maintenance
- Enables flush activation
Ensure the mechanism operates smoothly before finalising installation.
Step 7: Conduct Final Testing
Turn the water supply back on and allow the cistern to fill.
Perform several test flushes and inspect for:
- Water leaks
- Unusual noises
- Incomplete flushing
- Incorrect water levels
Address any issues immediately before completing the installation.
Common Mistakes to Avoid During Cistern Installation
While learning how to install a toilet cistern, it is important to avoid common installation mistakes:
- Incorrect Measurements: Inaccurate measurements can result in alignment issues, inadequate clearance, or difficulties fitting flush plates and toilet components.
- Poor Frame Stability: An unstable frame may compromise the performance and longevity of the installation.
- Inadequate Leak Testing: Skipping leak tests can lead to water damage and costly repairs in the future.
- Improper Water Pressure Considerations: Ensure the water supply pressure matches the cistern's operating requirements.
- Limited Maintenance Access: Always maintain adequate access to service internal components when necessary.
Benefits of Proper Flushing Cistern Installation
A correctly installed flushing cistern offers several advantages:
- Improved flushing efficiency
- Reduced water wastage
- Reliable long-term performance
- Enhanced bathroom aesthetics
- Easier maintenance access
- Better hygiene and cleanliness
Modern cisterns are also designed to support dual-flush systems, helping households reduce water consumption.
Choosing the Right Bathroom Accessories for Installation
Selecting compatible bathroom accessories can improve both functionality and appearance.
Consider:
- Flush plates
- Toilet seats
- Concealed frames
- Shut-off valves
- Water-saving mechanisms
Choosing quality accessories ensures the entire system operates efficiently while complementing the overall bathroom design.
Conclusion
A successful project to install toilet cistern systems requires careful planning, accurate measurements, proper connections, and thorough testing. Whether you are working with a concealed system or a traditional bathroom cistern, following a structured installation process helps ensure reliable performance and long-term durability.
By understanding the essentials of cistern installation and selecting suitable bathroom accessories, you can create a functional, efficient, and aesthetically pleasing bathroom environment that delivers dependable performance for years to come.